 Project 5
Project 5: Cover Photos
The purpose of this project is to make a program that processes a list defining a collage and builds the resulting image. The collage list information can specify if the program should apply an effect and/or an alpha blend to each image.
Here is the reference guide to the Zelle graphics package.
Tasks
For this assignment you're going to create a couple of new functions. The buildCollage function should go in your collage.py file and will process the collage list information and build the output image. The placeImageNoBkg function should go in your filter.py file and will be identical to placeImage, except that it will not transfer blue/green screen pixels into the destination image.
-
We will be adding a new item to the collage list to specify whether
the blue/green background should be removed when placing the image
into the collage. Therefore, instead of 6 items in each sub-list,
there will now be 7. You will need to add another IDX type constant to
your set of indexes.
You can use whatever ordering of information you like, but the provided test code assumes that the remove background information is at index 5 and that the Image information will be at index 6.
In your collage.py file, create a function buildCollage, as given below. Unless otherwise specified, each comment is a line of python code in the final function. The indentation of the comments should match the code.
def buildCollage( clist ):
    # assign to (cols, rows) the result of calling getImageSize with clist
    # assign to dst the result of calling graphics.Image with a Point of (0,0) and of size cols and rows
    # for each item in clist
        # assign to x0 the X-offset element of item (i.e. use the IDXXOffset index)
        # assign to y0 the Y-offset element of item
        # assign to operator the filter element of item
        # assign to alpha the alpha element of item
        # assign to noBkg the remove background element of item
        # assign to src the Image element in item

        # use a set of if/elif statements to apply the correct
        # operator to the image (this is several lines of code)

        # call placeImage to put src into dst at location x0, y0 with blend alpha

    # return dst
You can use the function testbuildcollage.py to test your buildCollage function. Read through the test function before you use it. The test function assumes that your build collage knows what to do with the operator strings 'rbswap' and 'original', as we went over in lab.
As always, remember to remove the comments we supply after you have written your code.
- In your filter.py file, create a function placeImageNoBkg that has the same arguments and functionality as placeImage, but does not copy the src pixel into the destination image if the src pixel is part of the background screen. Your function needs to work only for one of the background screens (blue or green). A good extension is to have your function handle both, possibly by adding a parameter.
- Edit your buildCollage function so that it uses the remove background information in the collage list, stored in the noBkg variable, to determine whether to call placeImage or placeImageNoBkg as the last step in the main for loop.
-
Make a new python file (e.g. mycollage.py) that contains a single main
function. Be sure to put a call to the main function behind a test on
__name__.
if __name__ == "__main__":
    main()
The main function should create a collage information list, call readImages, call buildCollage, then write the image to a file. You can use the testbuildcollage.py file as an example. Your collage should use at least four different source images.
The collage should include at least five different sub-images. Some of these can be copies of one of the source images with different effects. The collage should use at least 3 effects, at least one alpha blend (alpha < 1), and at least one blue-screen or green-screen image where the background pixels are not copied into the collage. You can access your photos here
Required image 1 is your first collage.
-
Make a new python file, coverphoto.py, that takes in at least one
image filename from the command line. It should build a collage
appropriate for a FB cover photo and write it out to a file.
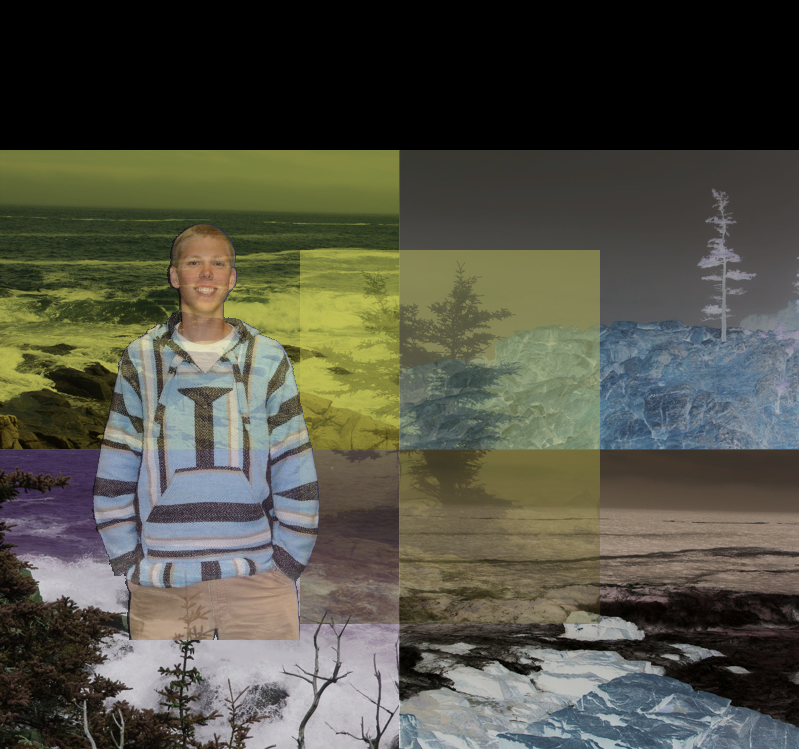
The collage should be about three times as wide as it is tall and have at least three sub-images. You can control the height and width of the collage by appropriate selection and placement of your images, or you can fix the relative height and width and change placeImage to safely handle images that go outside the image boundaries. You can choose random effects for the three images or pick specific effects. The collage should use at least two effects.
Required image 2 is your cover photo collage.
Extensions
- Create some new image effects you didn't implement in the last lab.
- Enable the placeImageNoBkg function to handle both the blue and green screens. You can try to do this automatically (e.g. by checking some part of the image) or by adding a parameter that indicates which kind of background screen is being used.
- Make some additional programs that generate collages with specific geometric arrangements and that take their list of image files from the command line.
- Add additional options to the collage information list, like whether to mirror the image or not, in addition to the other options.
- Create a collage dynamically based on how many images are given on the command line.
- Figure out how to call the proper effect function on each image without using an if/elif control structure. (Ok, this is kind of esoteric, but it's a cool feature of python.)
- Try scaling an image when you put it into the collage. If you want, stick to powers of two.
- Uber-extension: put the collage information in a text file. Have your program read the text file (given as a command-line argument), parse the information, and build the collage. For this to be an uber-extension, you can't write the text file as python code.
Writeup and Hand-in
Turn in your code by putting it into your private handin directory on the Courses server. All files should be organized in a folder titled "project5" and you should include only those files necessary to run the program. We will grade all files turned in, so please do not turn in old, non-working, versions of files.
Make a new wiki page for your assignment. Put the label cs151f17project5 in the label field on the bottom of the page. But give the page a meaningful title (e.g. Stephanie's project 5).
Your writeup should follow the outline below.
- A brief summary of the task, in your own words. This should be no more than a few sentences. Give the reader context and identify the key purpose and goals of the assignment.
-
A brief summary of the task, in your own words. This
should be no more than a few sentences. Give the reader (a
peer not in the course) context and identify the key
purpose of the assignment. You can assume your reader has
read through your prior assignments.
Writing an effective summary, or abstract, is an important skill. When you are writing yours, consider the following questions.
- Does it describe the CS purpose of the project (e.g. writing well-organized and efficient code)?
- Does it describe the specific project application (e.g. making pictures of space stuff)?
- Does it describe your the solution or how it was developed (e.g. what were you trying to draw and how)?
- Does it describe the results or outputs (e.g. did it turn out reasonably well)?
- Is it concise?
- Are all of the terms well-defined?
- Does it read logically and in the proper order?
- A description of your solution to the tasks, including any images you created. This should be a description of the form and functionality of your final code. Note any unique computational solutions you developed. If you include code snippets, they should be small segments of code--usually one or two lines and normally much less than a whole function--that demonstrate a particular concept. If you find yourself including more than 5-10 lines of code, it's probably not a snippet.
- A description of any extensions you undertook, including images demonstrating those extensions. If you added any modules, functions or designed any other complex shapes, note their structure and the algorithms you used.
- A brief description (1-3 sentences) of what you learned. Think about the answer to this question in terms of the stated purpose of the project. What are some specific things you had to learn or discover in order to complete the project?
- A list of people you worked with, including TAs, and professors. Include in that list anyone whose code you may have seen, such as those of friends who have taken the course in a previous semester.
- Don't forget to label your writeup so that it is easy for others to find. For this lab, use cs151f17project5