Lab 8: Recursion
The A-maze-ing project
In this week's lab, we will start working on a maze searching algorithm using recursion. The project is inspired by a robot competition called Micromouse, watch this video to get an idea of what micromouse is about: https://youtu.be/IngelKjmecg (you can watch this from 3:00). The goal of the project is to write a program that finds a path between the beginning and end of a maze.
The goals this week are to:
I recommend starting this project today. As always, let me know if you have any questions or if you need any help. Also, if you come to the truthful realization that micromouse is the coolest thing ever and you decide to build your own micromouse robot, I am happy to guide you through the process and provide all the tools that you will need.
Create a Project08 folder on your computer where you store CS151 projects and labs, hopefully somewhere that is backed up (e.g. in Dropbox, Google Drive, Microsoft One Drive, etc.)
Download the Python source code file project7.py through the following [Link]
Download the sample maze files (maze2.txt and maze3.txt) through this [Link]
Open VS Code. Open up a Terminal (e.g. Control+` in VS Code) and change the directory (cd) to the Project08 folder.
Write your file header with your name and file information. Read the code to check all functions and understand the general structure of the program.
The first function to be called in the main function is the read_grid("maze2.txt"). The function reads a file and initializes a grid based on the values read in the text file. Read the file docstring and comments to understand how it is intended to work.
To be able to open the text file make sure that you navigate to the project directory on the Terminal.
The function opens a text file, one line from the file at a time, and appends the line into a row in grid. Use the comments to write the missing code on your own. Remember the following functions that will help you in writing the missing code:
Test your code by printing the grid playground after you use read_grid in the main and inspect it visually.
The next function called in the main function is find_start. The function finds the start position of the maze by searching for a cell with the value ‘S’ and it returns a tuple of the row and column where the start cell is located.
Remember that a tuple is similar to a list, but it is unmodifiable and it uses ‘(‘ and ‘)’ to define its values.
Test your function by printing the row and column values returned by the function in the main, and match the values with the start position in maze2.txt. If you run into any problems we are here to help.
Now that you have a valid maze grid, let’s draw it using Python Turtles and check the results on the screen. Let’s start by locating the comment “# draw the final grid” in the main, and call the draw_grid method under the comment passing the appropriate values.
Notice that the function draw_grid is incomplete, write the missing code according to the comments and your understanding of how it should function.
Based on your comprehension of the function, what is the meaning of the following values in the grid? highlight the text between the parentheses to see the answer.
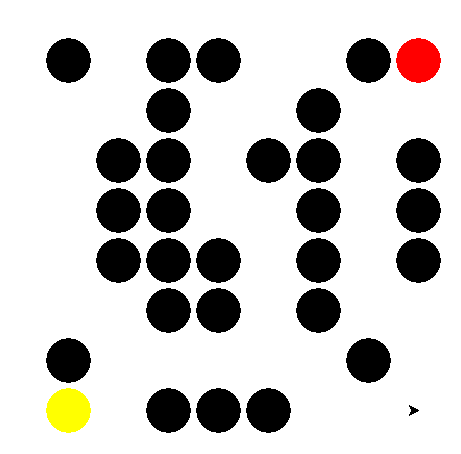
Testing your function with a grid based on the file maze2.txt, should result in the following Turtle drawing:
Test your draw_grid function by inserting X, S, E, P, T, D, and 0 into known positions in the grid. Try one symbol at a time and examine the results. Let us know if you run into any problems.
The main task in your project is completing the recursive function search_from. Start by uncommenting the function call in the main, and take a look at the function docstring and comments to understand how it works.
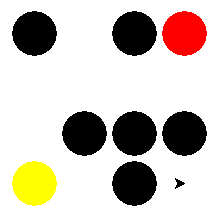
To make tracing the function easier on a piece of paper, start by creating a new text file called maze1.txt that represents the following grid (take a look at maze2.txt for reference):
The function implements a popular search algorithm. Write the missing code in the function according to its comments.
According to your comprehension of the function, what makes it a recursive function? (It calls itself) highlight the text between the parentheses to see the answer.
The first comment has the following direction: Make sure row and col are valid positions on the grid. In other words make sure that row and column are values on the grid and are within the bounds of the indexes of the grid.
The second part of the project focuses on finding the path from start to end as a set of tuples where each tuple consists of a row and column of a cell in the path from start to end. To complete this task, make sure your search_from function marks the path in the grid playground.
The path is a list of tuples. Therefore you should be able to print the length of the path and validate that number through visual inspection of the final answer. Make sure you print the number of steps taken to find the path in the main function.
Required Image. Make sure to include in your report an image showing the path from start to finish as a result of successfully running your program with the file “maze3.txt”.
Suggested extensions:
1- Come up with a cool maze that shows the word Colby or something similar (be creative!). (1 point possible)
2- Enhance the visual elements of the game by adopting a maze-like appearance instead of dots. (2 points possible possible)
3- Create a function that randomly generates a maze with a start, a finish, and some obstacles. It does NOT have to be solvable. (2.5 points possible)
4- Create a function that randomly generates a maze with a start, a finish, and some obstacles. Make sure the generated grid is always solvable. (3 points possible)
5- Convert the project to a game where a player uses the up, down, left, and right buttons to search through the maze. (3 points possible)
6- Modify the code to enhance the search performance by making the algorithm take fewer steps to find the end of the maze. (4 points possible)
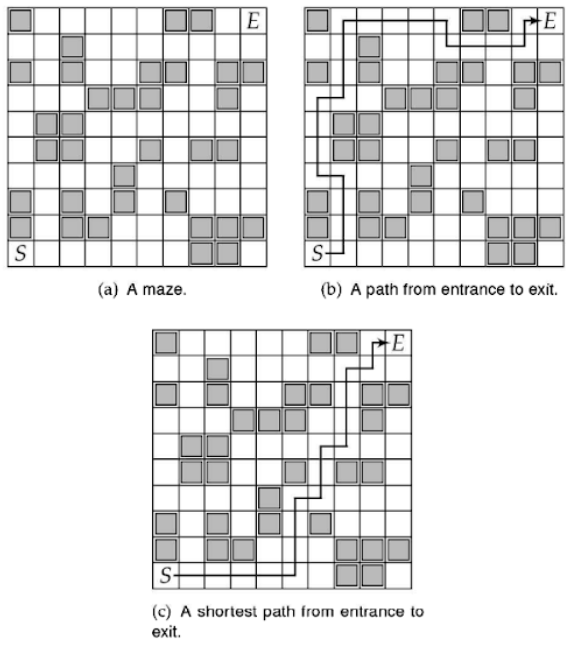
7- Implement a different algorithm that finds the shortest path between start and end in the maze (check the example below). The current solution is not guaranteed to find the shortest path (check (b) in the example below), but there is a way to always find the shortest path that you can implement (check (c) in the example below). This algorithm is called Breadth First Search. It takes more steps but it always finds the shortest path, you can learn it and implement it (start learning here: https://youtu.be/GC-nBgi9r0U). (4 points possible)